As your website and business evolve, it’s common to update your site’s structure, content, or organization. However, when you change a URL on your website, you risk breaking old links and sending visitors to a dreaded 404 Error page. But don’t worry; there’s a simple solution – URL redirects. In this article, we’ll guide you step-by-step on how to create a URL redirect in Squarespace, helping you ensure a seamless experience for your site’s visitors while maintaining your search engine rankings.
What is a URL Redirect?
Before we dive into the “how,” let’s clarify what a URL redirect is. A URL redirect is a technique used to forward website visitors from non-existent or inactive pages to active ones. There are two primary types of URL redirects: 301 redirects and 302 redirects.
301 Redirects
These are used for permanent changes on your website. A 301 redirect takes visitors from an old URL to a new one. This not only enhances the user experience but also maintains your search engine ranking.
When to use 301 redirects:
-
-
- When you change the URL of a page or blog post.
- If you create a new version of a page or blog post.
- When you delete an old page or blog post.
- During a website migration or redesign.
-
302 Redirects
These are intended for temporary changes to your website. A 302 redirect directs visitors to a different URL, but it does not transfer the same ranking as a 301 redirect. It’s ideal for businesses that frequently change their offerings or temporarily disable pages.
When to use 302 redirects:
-
-
- When you want to temporarily replace a page with another.
- When you need to take down a page temporarily for an update
-
How to create a URL redirect in Squarespace
Now that you understand the importance and types of URL redirects, let’s get into the nitty-gritty of creating them in Squarespace. Here’s a step-by-step guide:
Access Settings:
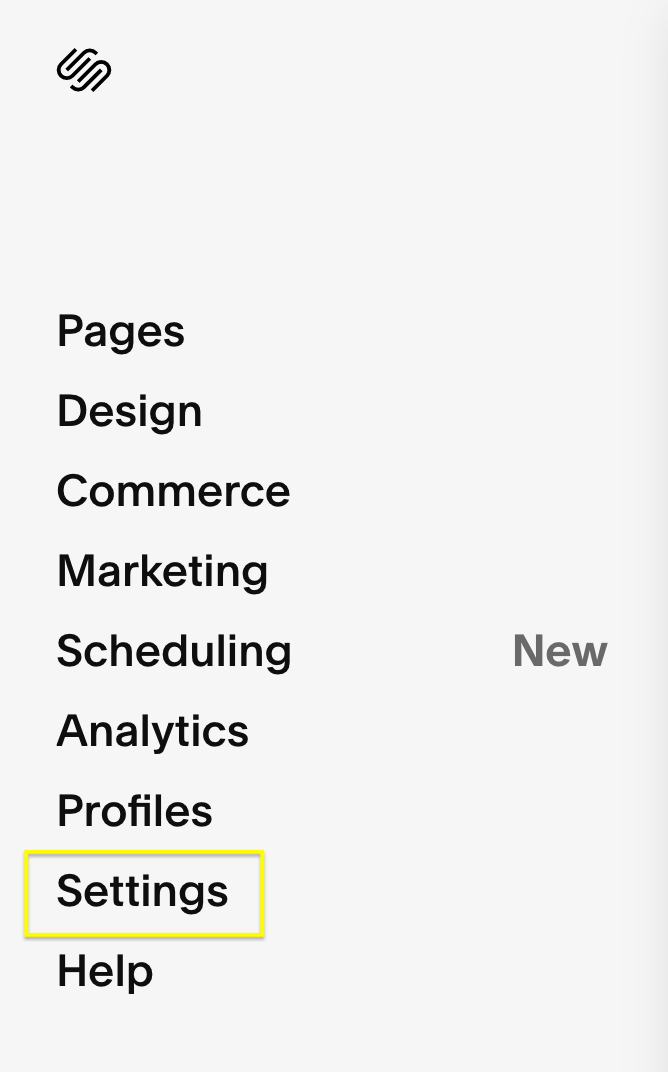
- In your Squarespace dashboard, navigate to the Home menu and click on “Settings.”
Go to Advanced Settings:
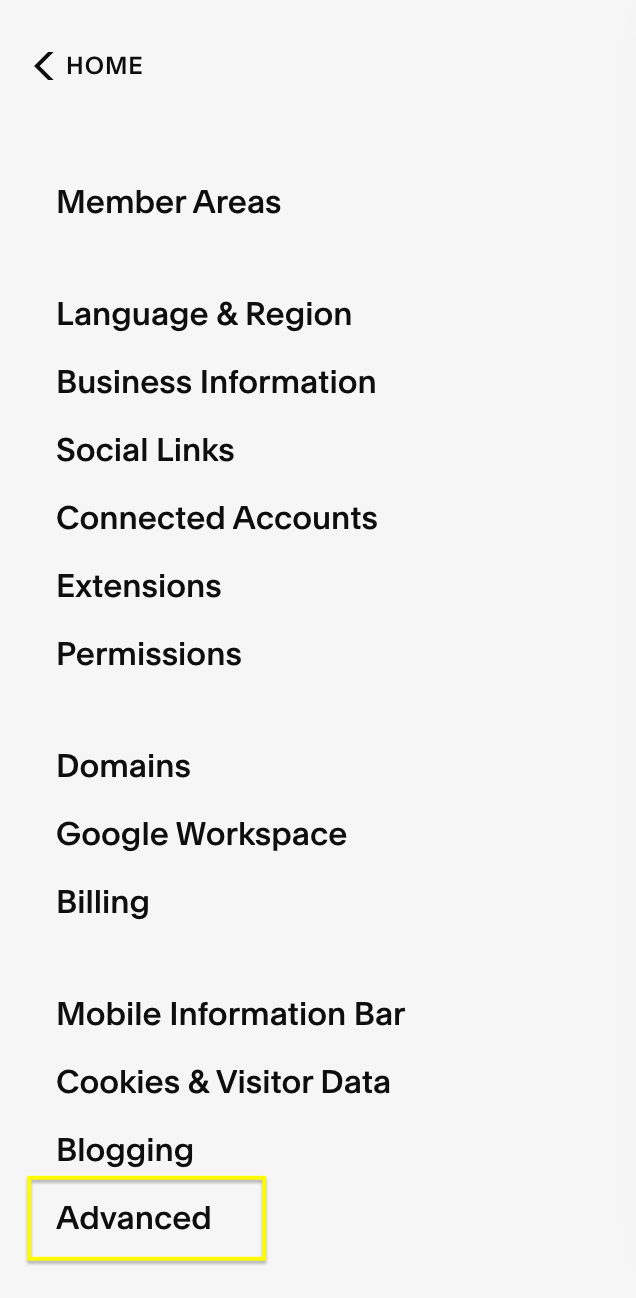
- Scroll down in the Settings menu and select “Advanced.”
Access URL Mappings:
- From the Advanced settings, you will see an option for “URL Mappings.” Click on it to access the URL mapping tool.
Create Your Redirect:
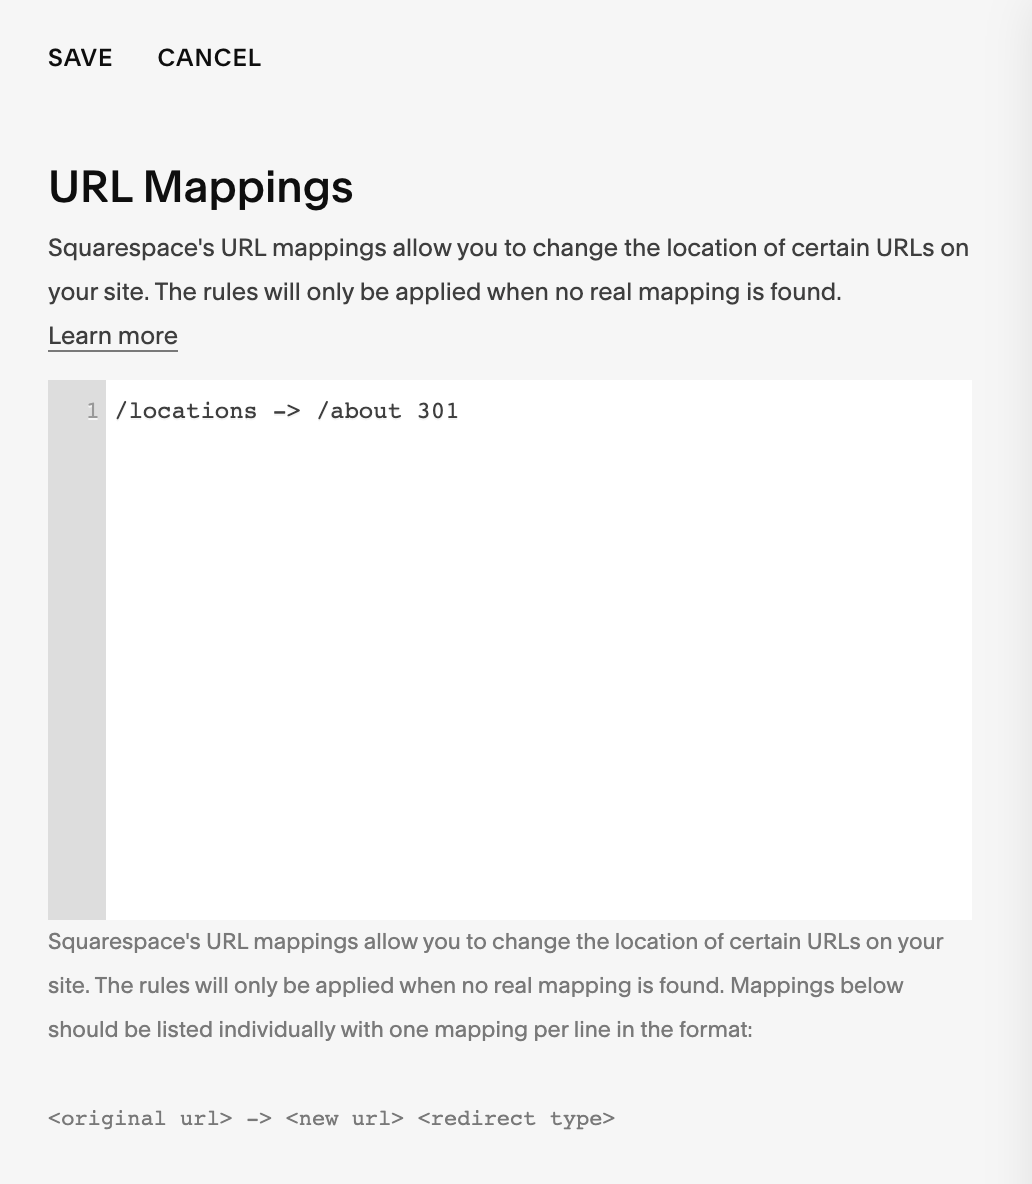
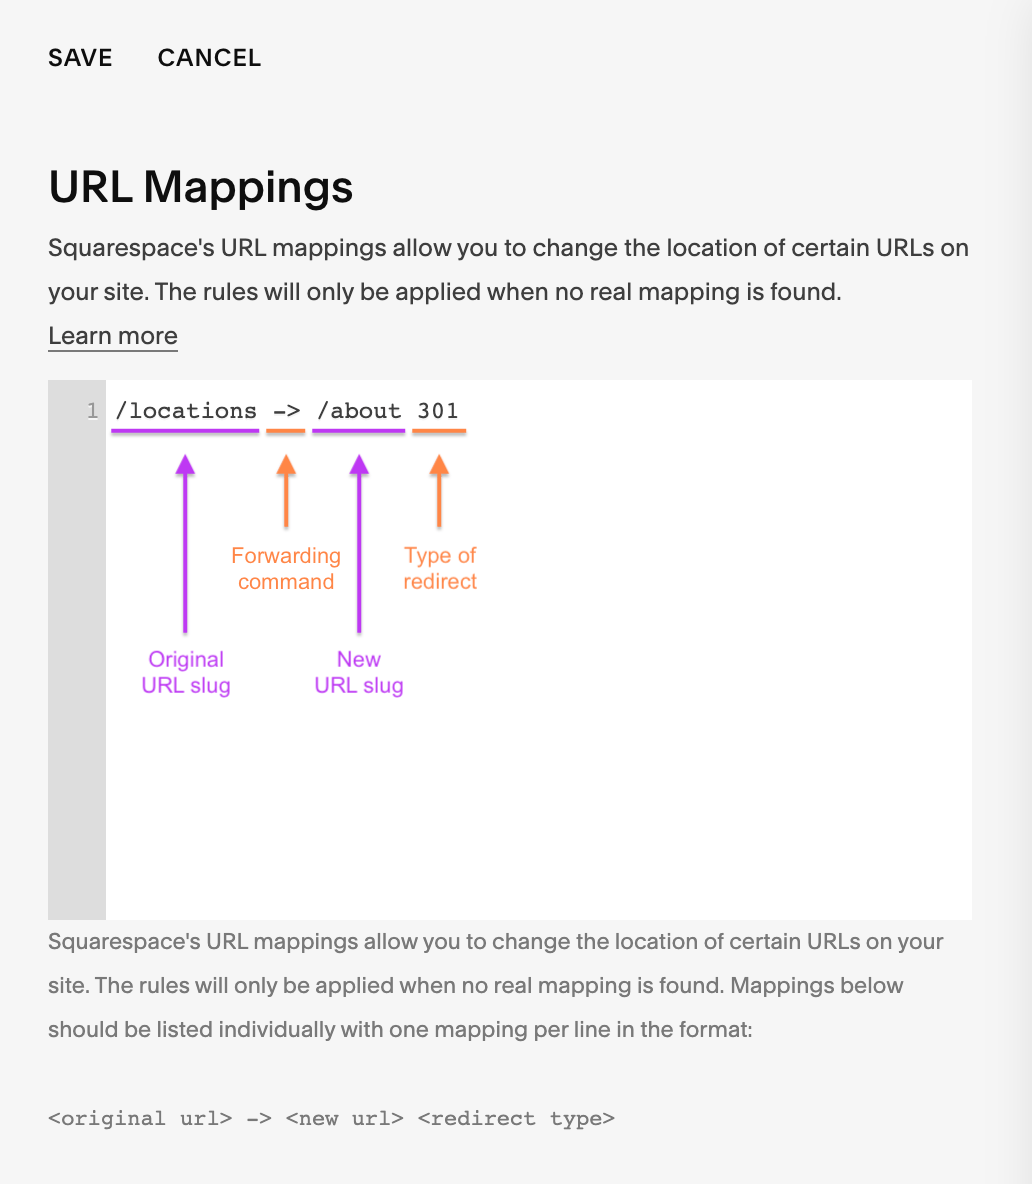
- In the URL Mappings panel, you’ll find a text box where you can add your redirect in the following format:
/old-url-here -> /new-url-here 301
- Replace “old-url-here” with the URL slug of your old page (the part that comes after the slash).
- Replace “new-url-here” with the URL slug of the new page you want to redirect visitors to.
- Choose between “301” and “302” based on whether it’s a permanent or temporary change.
Save Your Changes:
-
- After inputting the redirect, hit “Save” to apply your changes.
Test Your Redirects:
-
- It’s essential to test your redirects to ensure they work correctly. Type the old URL into your browser, and you should be automatically redirected to the new URL.
- If you encounter a 404 Error, double-check the URL mapping formula (step 4). Ensure that the original content is disabled or deleted, and that the new content is active.
Additional Key Points about URL Redirects in Squarespace
- Specify Redirect Type:
- When creating URL redirects in Squarespace, it’s essential to specify whether you want a 301 or 302 redirect. The choice between the two redirect types depends on the permanence of the change you’re making.
- Redirect to External Links:
- Squarespace allows you to redirect a URL on your domain not only to internal pages but also to external links. This means you can seamlessly direct your visitors to resources outside of your website, such as Google Forms or entirely different websites.
- Maximum Number of Redirects:
- Squarespace provides the convenience of setting up redirects, and you can have up to 3,000 redirects on your site. This ample capacity ensures that you can manage and maintain a large number of URL redirects to enhance the user experience and website navigation.
Conclusion
URL redirects play a crucial role in maintaining a seamless user experience while preserving your website’s search engine rankings. As your business evolves and your website changes, implementing redirects is essential to avoid broken links. Regardless of your business type, good SEO practices are vital, and URL redirects are a part of that strategy. By following these steps in Squarespace, you can make URL changes confidently, knowing that your visitors will have a smooth experience. So, go ahead, update your website, and embrace the power of URL redirects!
